Thursday, March 31, 2011

Polenta Pizzas - Crazy cheap dinner that is crazy delish!

Here's to one of the funnest & cheapest recipes i've come up with in all of my endeavors. Polenta pizzas. A good friend of mine is a Chef, a super awesome one, and introduced me to polenta! It was always one of those things I was always apprehensive to try, and never imagined making it at home, but once I picked up my 5 lb bag for less than 5 bucks, I knew i'd be making a load of meals!

You first want to start with all ingredients depicted; all 7 of them! (Cheese, Marinara Sauce, Cornmeal, Salt, Water, Olives & Olive Oil)

Here's how to make the Polenta; for every 1 3/4 cups of Polenta you need 6 cups of boiling water that has 2 tsp of salt. This is the proportion I use to make dinner & lunch for my husband the next day. It's deceivingly a ton of Polenta. So let's say you go with the proportions I stated above, here's what you should do:

Get 6 cups of h20 boiling, add 2 tbsp of salt, and slowly... I repeat slowly mix in the polenta. My friend said that if you were to add it all, you'd get a big funky ball of cornmeal, so I listened to him & so should you. 


If you run into lumps like this, which is pretty common on my end, don't fret because it's easy to fix & the more you make Polenta the easier it gets! Just grab your immersion blender, and for a couple minutes blend into the smooth mixture you intended to achieve.

Ah, there we go! Look at that, nice & smooth. As if it never happened!

Reduce your heat to simmer Polenta for around, 10 - 15 minutes. Throw in half a cup of chopped olives, a little cheese, and whatever else you normally like on top of your pizza (get creative!) Then, place in an elongated glass dish & let cool for around 1 hr 45 minutes (or until it's set into a solid) in the fridge. This stuff is so amazingly simple to handle once it sets right!
I personally prefer cubes, but one time to add character to the plate I used a round cookie cutter to have circles! Then, in a side sauce pan, heat about 3/4 of a cup of any kind of pasta sauce. I'll grab my store purchased stuff for this one, because making a home made sauce here isn't necessarily cheaper. Cut the polenta into cubes/squares, grill for a few minutes. Then, spread the marinara over your polenta slices, and sprinkle cheese. Mmm!
After making this my way, I know you'll find your own variations you absolutely love!

I like to serve a salad with this!


Want some other ideas for when you buy the big bag of Cornmeal?
1. Homemade baked or friend Corndogs
2. Hush Puppies
3. Use as a coat - on things you'll fry like fish
4. Cornmeal pizza crust
5. Polenta soup, garnished with freshly grated parm, tomato slices & basil - mmm!
6. Cornbread - my fav to make is Mexi style w/ onions, peppers & corn!
7. Morning muffins w/ berries
& it definitely doesn't end there! See you guys soon! - BCB

Wednesday, March 30, 2011

Let's get it poppin'.... (Awesome, super cheap & easy to make Jalapeno Poppers!)

So it was movie night, and we needed something else besides popcorn (love the classic kettle corn, but we were both craving something to tide us after our healthy salad dinner, & this proved to be quite the yummy choice)
I hit the fridge, and immediately upon seeing the bag of delicious Jalapenos I purchased a couple days before I thought *JALAPENO POPPERS!* I had no idea how to make them, or where to even start, but I always remembered them having cheese - so that's where I started.
Of course there is cream cheese in our fridge, it's quite the staple, so I grabbed that, some pre-shredded cheddar, garlic cloves and hit the cutting board. My next step was to clean the Jalapenos, then cut them vertically in half. I decided to remove only half of the innards because this is where the heat is, packed into the core of the Jalapeno, so depending on how much you want to crank the heat on your poppers, either partially remove the seeded core, entirely remove it, or leave everything for a crazy hot bite! I then slathered cream cheese into the halved portions, minced garlic and layered that, then finished off my poppers with cheese - mmmmm. I preheated my oven to 375, so she was ready to go. We prefer to have them crunch, so they are in the oven only 20 minutes, but if you like them a little more cooked, go ahead and do 40 minutes. Take out, have a napkin ready and a something to drink, then it's ON! Hope this inspires you to have fun with ingredients!

The grand total of this was:

  • 1.00 portion of Jalapenos (hit the small markets & discount places for these)
  • 1.50 portion of storebrand cream cheese
  • Appx. .50 on cheese & garlic I keep stocked up in the fridge!
Super fun, delicious & easy treat you can make for hardly nothing!
See you guys soon! - BCB

Tuesday, March 22, 2011

Have you thought about doing this in a hotel?

Goodbye home, see you in 3 days
While going along with my husband on a work training trip, there's no way i'm letting go of the budget just because we're over 200 miles away from home and my kitchen. So, a week before I knew we were leaving, I started purchasing everything I needed to bring prepped meals along with us.
It sounds like a hassle, but trust me, wasting your money, gas driving to get to restaurants & the down time you could have reserved if you stayed in & ate - that to me sounds like a hassle!

So here's what I did:

My first stop, was at the local warehouse store, where I purchased a 5 lb package of ground turkey for 5.99 - it's a great deal, and even though I didn't need that much for this trip, I purchased it, because you can hardly beat less than 1.20 a lb! So I broke down the package, and carefully froze it into 5 parts, but kept one out to make: Dinner 1.

My second stop, was to the local market to pick up small things that are in the meals below.

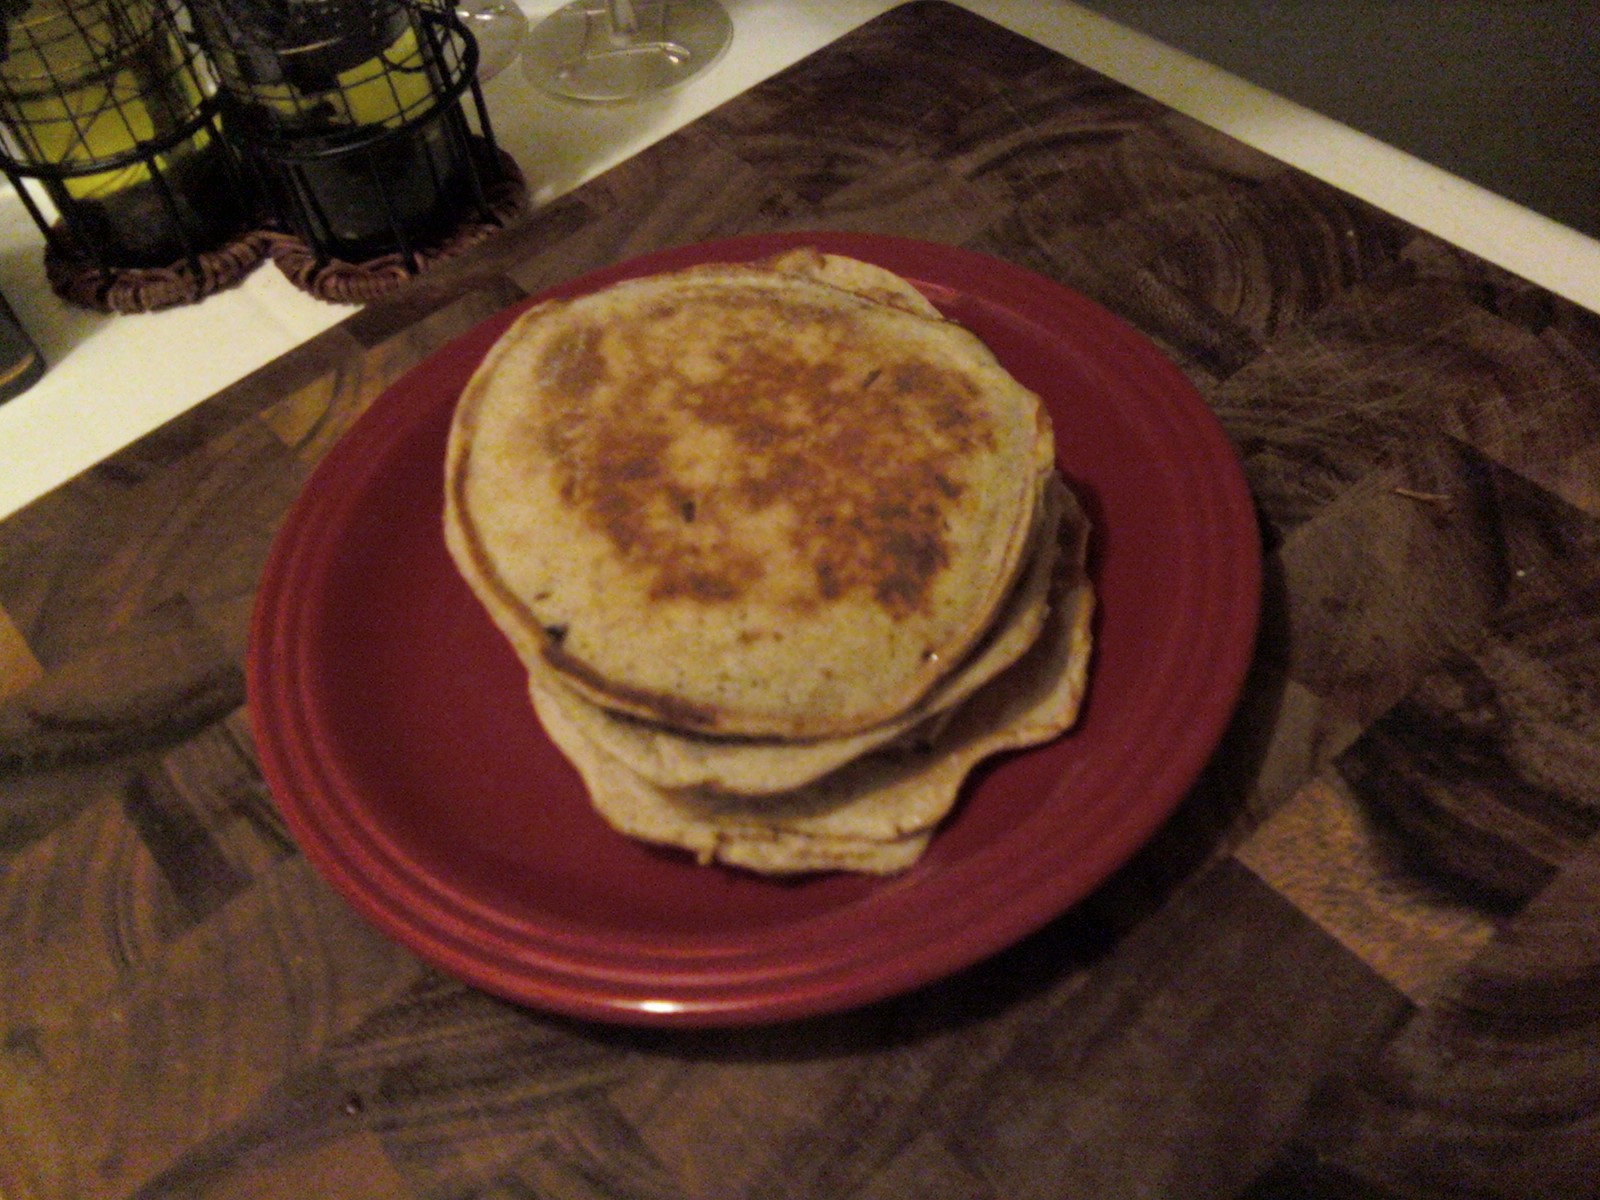
Dinner Night 1: Stuffed  Romano & Parm Meatballs, Whole Wheat Penne & Basil Marinara Sauce - for less than 3 dollars. I've heard rants on cooking shows, complaints from people I know & just know there's a general 'meh' about using ground turkey as a substitute, but if you do it right, you're going to hardly tell the difference that you substituted a far healthier meat. It really pays off. Not only is ground turkey very lean, it is much cheaper than ground beef! I add 1 lb of meatballs, throw in 1/2 a cup of chopped onions for moisture, 1 egg, 1/4 of a cup of bread crumbs, 1 tsp salt, 1 tsp black pepper, some freshly chopped herbs (anything that's in the fridge!) and some garlic - roll into a ball, push a cavern in with my thumb, fill with cheese (I choose a mix of Romano & Parm that costs 2.25 - I only use 3/4 of the container here), then close the cavern with the top of the meatball. I chose to bake, but a lot of times grill over the stove with some olive oil. Your choice. So once I finished the meatballs, I boiled the pasta, then packed those two together in a glass pyrex once they were done, and put a jar of premade basil marinara sauce (1.50)  in the cooler. Dinner for night 1 - 3.00

Dinner Night 2: Stuffed Cabbage. This is kind of my favorite food in the whole world right now. A chef I really admire inspired me, by a super fancy recipe of hers, but I omitted over half the ingredients and came up with something my husband & I really like. You should really try it and not be like how I was at first, I was scared when I saw stuffed cabbage. It sure sounds complicated, but it's a 2 out of 10 for how easy it is. Essentially you're boiling the whole head of cabbage, removing the leaves, and with a few simple folds after you place a yummy meaty, saucy & rice-y mixture in, baking, for over an hour - and it's incredible. I'll give out my recipe for anyone who wants it - or you could simply look up a few on the internet based on your taste preferences. On St. Patty's Day, cabbage was .19 a lb, making a huge head under a buck - and this is what I used, but normally a nice sized cabbage is right over 2 dollars. Brown rice? We all know how cheap that is. Then, I used one of those sectioned off lbs of turkey I was telling you about earlier, also. The dish, is right under 3.75 for ingredients when you purchase in bulk & split up. It's a crazy cheap, & delicious meal to make.

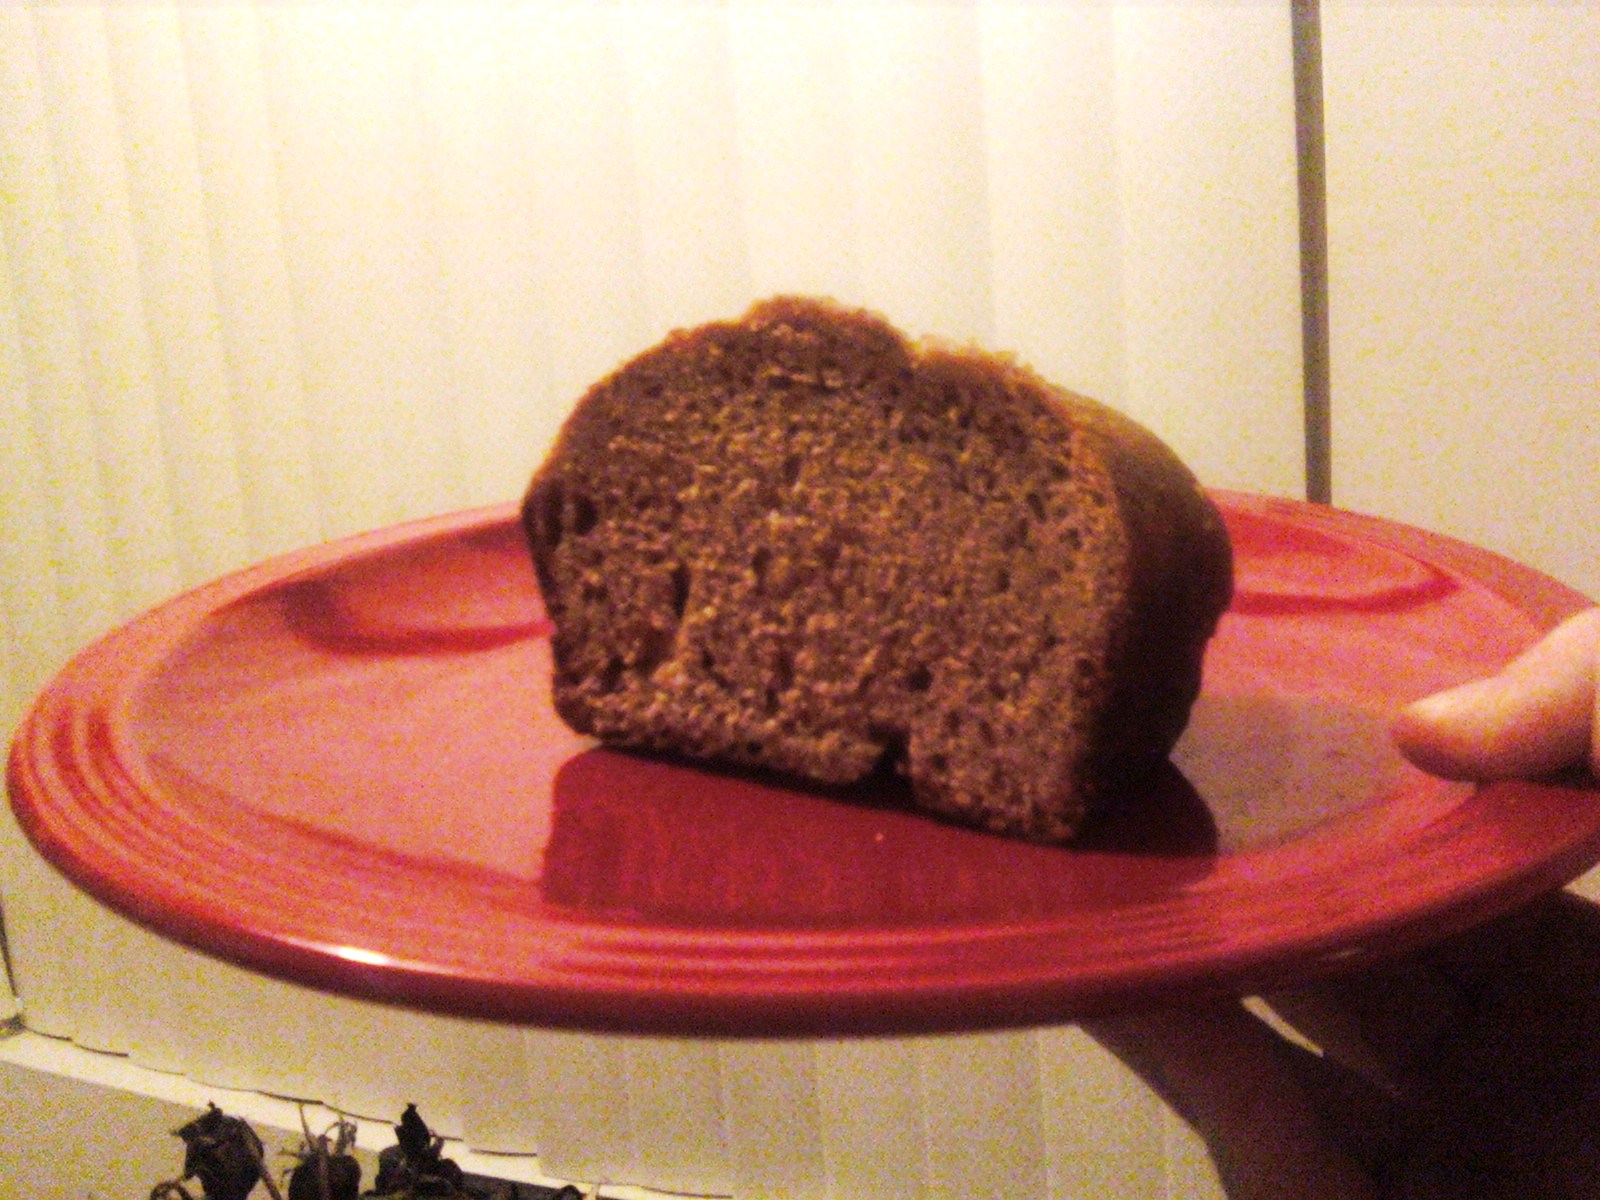
Lunches - too simple to waste 10 bucks for two of us to eat at a sub shop. I made a loaf of bread (under 1 dollar) cooked up chicken thighs I had here at home for the meat to put inside, and grabbed a head of lettuce for 1 dollar. Mustard, was in our fridge so we packed that too. I went out & purchased smoked gouda slices, which was the most expensive thing, but absolutely the most delicious. We had these sandwiches all 3 days with sides of carrots & celery with almond butter, fruit slices, seaweed snacks, all kinds of things to have variations. So for 3 days of eating lunch, we spent a whopping 5 bucks.

Breakfast - came with our room, but if it didn't, I personally would search for somewhere that offers complimentary breakfast. So many places do, so it would be really worth it to see if there's somewhere just as close, to knock off a potential 60 dollar bill from breakfast for 3 - 4 mornings. If not, pack your own bagels & cream cheese (2  - 3 dollars), cereal & milk (2 - 3 dollars) oh you name it!


Ice: I started cranking it fout days before to avoid paying. 2.00, is still a loss if it's something I could have done. When the ice starts melting, we drain it, and re-fill with the ice machine that is on the level of every hotel room.
Cooler: We borrowed from a friend. If you don't have a cooler, I am sure you have a friend who has a cooler.
Packing ware: I chose glass & plastic - only placing what needed to be refrigerated in the cooler, & what didn't need to be kept cool, in a separate bag.
Utencils, Plates, etc.: Make a list from all the meals you prepared - pack them in a bag, and toss them in the car. See you guys soon! - BCB

Wednesday, March 16, 2011

New dishes from leftover Pancakes!


I don’t know about you, but no matter how much I alternate on a recipe, or guesstimate how much my husband & I will eat, we always have left over pancakes! From watching my mom, I got into the rhythm of freezing things before they go bad, so after the past 6 months I’ve come up with a few creative ways to make left over pancakes something you'll look forward to seeing!

1. Pancake Skewer Kabobs (Cube, add sausage between each slice) 
Simple Directions
  • All you need is some kebab skewers and/or chopsticks, leftover pancakes, cooked sausages & syrup
  • Cut the pancakes into 1 in squares/cubes, and cut your sausages into spheres (if you're working with flat sausages, cut them the same way you cut the pancakes) 
  • Then - drizzle syrup or dip!


2. Pancake rolls - roll out pancakes & spread them with Nutella, Honey, Bananas, Jam + Cream Cheese.. Whatever kinds of spreads you like, then roll up & eat. Mmmm!


3. Pumpkie Pie Pancake Bread Pudding
Ironically, I got this recipe right, well right away. I thought there'd be some issues with the pancakes, and how different they are from starchy bread that is typically in bread puddings, but it works - and i'm happy I nailed it so you can too!

Ingredients
Around 6 – 8  medium sized pancakes (thaw them if they are frozen!)
·         ½ cup apple sauce
·         ¼ cup pumpkin puree
·         3 large eggs
·         ½ cup milk
·         1 tsp vanilla extract
·         3 tbsp room temperature butter
·         ¼ cup sugar
·         ½ tsp salt
·         4 tsp Pumpkin pie spice

Directions

·         Pre heat oven to 350 degrees.
·          In a medium sized mixing bowl beat the eggs, butter, milk & vanilla extract. Add Pumpkin Puree, Applesauce – and once all the wet ingredients are incorporated, start mixing all dry ingredients.
·         Chop your pancakes and fold into the mixture.
·         Grease a medium sized baking pan and pour out into the dish.
·         Finish with a quick sprinkle of salt over the dish, and some additional pumpkin pie spice.
·         After about 30 minutes, check the dish, seeing if it has cooking thoroughly. It should take around 35 minutes in the oven. Enjoy!


4. Storing pancakes in the freezer - to be ready to pop into toaster for breakfast! (Waffles, too!)

So now that there's those few things, I want to add in here how to make simple syrup, because once you get that down - you can make so many variations, and different flavored syrups. I learned this technique from one of my favorite chefs,  Giada De Laurentiis and it's led me to all sorts of concoctions like strawberry simple syrup, lemon simple syrup & rosemary syrup. Here's the jiff:

 It’s simple; simple syrup is simply sugar and water. It’s very easy to make; all you need to prioritize 

  •     Using a ratio of 2 parts sugar to one part water. When you boil the sugar, what’s actually happening is on a molecular level the sugar is splitting into two different types of sugar. Simply put, these two newly separated sugars make a magically sweeter syrup that is so yummy & you can do so much with! People use it as bases for certain types of ice creams, for lemonades & teas – you name it!


Side note: Simple syrup has a much different consistency than standard syrups you purchase in the store. It's not as thick, so if this isn't something you like, then stick to the stuff you normally purchase.
See you guys soon! - BCB

Leftover Beans & Rice in the fridge?

Here's a dilemma I commonly run into being that one of my favorite food combinations (along with most of the world) is
rice and beans. The only problem, is that there's always some left over after you make them - which is not a problem to you anymore because I have 4 ideas of how to transform and reinvent your B & R - making them all the more economical and budget savvy.


1. South Western B & R Bake

Ingredients

  • 2 cups of cooked rice (you could start w/ uncooked rice here, just make sure you cook then add it)
  • 2 cups of cooked pinto beans (again, you could start w/ dry pintos, but make sure you cook then add)
  • 1/2 cup of chopped yellow onion
  • 1 tsp oregano
  • 1 tsp cumin
  • 1/2 tsp Salt
  • 2 tbsp olive/vegetable oil
  • Around 4 finely chopped Garlic Cloves or 2 tbsp. Garlic Powder
  • 8 oz. of canned, frozen or fresh corn
  • 1/4 cup chicken/vegetable broth - or water
  • 4 tablespoons of rough chopped parsley
  • 1/4 Smoked chipotle salsa
  • 1 cup shredded cheddar cheese
Directions
  • Preheat your oven to 350. Start by adding your oil, and once heated, add the onions and cook until they are translucent. Add the garlic, salt, cumin & oregano, and keep stirring. Add the beans, corn, chicken broth, and rice. Let the mixture simmer for about 5 minutes. Take your pot away from the heat. Add your parsley.
  •  In a medium sized baking dish, gently pour out the mixture using only half - and now add evenly as a layer, your chipotle salsa and about half of your cup of cheese. Resume pouring the rest of the mixture, and finish with the rest of your cheese!
  • Bake for approximately 20 - 25 minutes; you'll know it's ready when the cheese is browning & bubbly, and of course the smell of all those wonderful ingredients. 


2. The obvious: Bean & Cheese Burritos
The catch: to freeze & pull out when you're ready for them!

3. Serve B & R again - but with some attitude!
For Christmas Dinner this year, it was my first time cooking the special meal for my husband and I - so what I did was a whole Mexican American Food themed night. Long story short, I had all kinds of fresh ingredients left over that I decided to do the dinner again, very similar, but with some adjustments.
On a plate, I had fresh cilantro, finely chopped yellow onions, along with sour cream, fresh guacamole, spicy salsa and cheese - and it was arranged in rows, so it had  unique presentation.
For the beans, place them in a baking dish, and cover with tons of cheese. Broil at the last few minutes to get a bubbly crust.
For the rice, transform it to Cilantro Lime Rice by adding for every 1 cup of rice, 2 tbsp of Lime Juice freshly squeezed & 1 tbsp of Cilantro. Sprinkle in some salt!
Serve with hot tortillas!
A pico de gallo here would be real tasty, I just didn't have the tomatoes or the peppers.

4. B & R served along with 'Lentil Meat Tacos'
Lentils, along with all types of other legumes
& beans are a highly cost effective way to
achieve a healthy diet.
It sure sounds odd, but after my dying curiosity of all the fun things to do with Lentils because of their amazing Nutritional content and price - 1 lb is always around 1 dollar. So after some tinkering, and some inspiration of chefs who have done the amazing thing of transforming Lentils into a meat substitute (this recipe, is going to work for Burgers, Taco Meat - you name it! Whatever you can get creative with. I'm sure, if you increased the amount of binders, so maybe the eggs, you'd be able to achieve something like a 'Lentil Meat Loaf'


Ingredients:

  • 2 cups of Lentils - cook them based on the instructions on the bag, but add 2 bay leaves to the water. Tip: I've been told many times to not add salt during the cooking process of many legumes & beans because they toughen them - so if you're going to salt your lentils, do it after they are cooked.
  • Around 1 cup vegetable juice/tomato Juice 
  • 2 tbsp oil
  • 1 egg
  • 1/2 of bread crumbs, cracker crumbs, etc.
  • 2 whole carrots - grated
  • 4 tbps of fresh chopped parsley
  • 1 tsp salt
  • 1 tsp pepper

Directions:

  • In a large mixing bowl, combine all of the ingredients except for the tomato juice and oil. You should use the tomato juice in small increments, adding it to the mixture as you need to to make it a ground beef consistency. Use the oil in your frying pan (I highly suggest non-stick) The mixture cooks very similar to preparing ground beef. 
  • * If you were to do patties to make burgers, shape into flat spheres and cook for a couple minutes on each size then serve on buns with lettuce, guacamole, tomatoes - whatever you like on your burgers!

See you guys soon! - BCB

Wednesday, March 9, 2011

Bay Leaves - they are a big DEAL


After skipping this ingredient in many dishes over the last half year, I finally asked myself 'What would happen if I actually used it?" 
I'm a skeptical person when it comes to ingredients, but am also open to being instructed. One day, when I went to the budget store I saw the bag of Bay Leaves, and after one glance they started calling my name. I told them i'd be back, and indeed after picking up a few spices, I returned to them. There they were, those green, flaky odd leaves. When I got home, I started with placing them in hot water - and immediately the aroma was intoxicating; it was earthy, spicy and smelled like I was cooking up an entire meal. Curious now about them, I decided to start with using a couple to boil my lentils for my Veggie Burger Patties (Recipe will be posted eventually - if you can't wait, i'll email it to you!) and they made those tough little legumes taste as if I was intentionally seasoning them to perfection. 
Awesomely enough, even though you actually don't eat the leaves themselves (Good point to bring up: Take them out after you've used them -> suggestion: if you have issues fishing non-edible seasonings/ingredients; bundle them up in a piece of Cheesecloth, place in the dish you're cooking, and remove the bundle once you're done!) they provide Vitamins & Minerals! 


So next time you're making something such as:
- Split Pea, Lentil or any kind of Soup, or a whole variation of Stews
- Pickled or preserved foods
- Marinades & Sauces


Add a few bay leaves as a budget friendly way to add unique character to numerous dishes!


See you guys soon! - BCB

Stop... Purchasing.. BREAD AND PIZZA DOUGH!! (Should I make it, or buy it?)


One of the best ideas my Mom has ever had, was for our Wedding, to not create a Registry.

She had a good reason.


My brother got married 2 years before I did, and long story short, there were quite a few doubles of Glassware, Stainless Steel Cooking Sets & you name it - so my Mom purchased them from my sister in law, and passed them onto us for our first nest together.
Being that my husband & I never lived away from our parents & after the Wedding was the first time we shared a new place besides our bedrooms with siblings, we essentially didn't have a single thing we needed to live together - (well there was his Memory Foam Pillow, but you get my point.)
What's left of this loaf!
So we started from that point with the decision to not create a Registry, but of course this led to phone calls from all our guests asking 'So where are you guys Registered' - so this led us, to brainstorm all of our poetic skills to compose what would be inserted on a separate card that was placed along with our invitation (I have more details on this rendezvous on 'My 3 G Wedding Blog) and read simply that we long for our families presence more than anything, but here are our particular interests -> Markets & Big Retail Stores. With 150 friends, family members & all sorts of loved ones, we were absolutely overwhelmed with the generosity of everyone who showered us with everything we need for our first 6 months together. This is what leads me to my point: the gift cards we received I purchased all kinds of baking goods, hardly knowing the difference between self rising flour & bakers flour, and what bakers sugar was vs. standard sugar vs. brown sugar. (We'll chat yeast later, that's it's own arena) So here I am, a completely unexperienced, yet fully stocked and determined pre-chef. This allowed me to tinker around having quite a few baking disasters, ruined Pyrex Glassware, smoke alarms sounding BUT in the end, proving to myself that learning to bake & cook essential things that we pay for daily (Bread, Bagels, Tortillas, etc.) is really a waste of hard earned money.
I've heard, from my more on the go pals 'My time is just not worth making all that; eh, bread has to rise, yeast has to double, bleh...' But my question I ask immediately to them, and ask to you - is your hard earned money worth paying someone else to do something so simple?  
When I see pre-made items at the store, I see dollar bill signs flying everywhere. Almost 5 $ for a loaf of bread? When in approximately 1.5 hrs, from start to finish I can make appx. 8 loaves for that much! (And I am not talking nutritionally deprived white bread here; think more Wheat Germ & Flax Seed Whole Honey Wheat)
But don't get me wrong - you have to use discretion here and understand basic math when doing calculations. You should always compare items by their oz, because this is how you're being charged. We've all been victims of shopping at large Warehouse style shopping centers, where we think the larger package = a better deal, then you hit the smaller stores and you see you really paid $.40 cents an oz, but bought tons and tons of it. There are truly just some things not worth making at home... and this was a lesson learned hard.


The title of my blog came from being in line at a market, seeing a couple purchase all kinds of prepared foods (some are negotiable in my book) baked goods, pizza dough, oh you name it! In this huge cart that I waited about 5 minutes over, there wasn't anything they purchased to prepare their own food -
I wanted to say to the woman 'That prepared polenta, is almost 3.99 & it's only 3 - 4 servings. Buy a 5 lb bag of Cornmeal, and you'll be making all sorts of variations of Mushroom, Heavy Cream & Aged Cheddar Polenta, Corn Dogs, Fried Fish Coating, Corn bread - you name it! (More to come soon on all the things I do with a bag of Corn Meal) "And that bread, wow heart healthy - very fancy, but almost 5.00! You could make around 8 loaves for that!" Then I would be inclined to finish with "Someone once told me if Tortillas have more than 3 ingredients, you lose authenticity - Can you pronounce half of those chemicals? Make it at home!" So instead of making myself out to be some over opinionated yipster, I decided to take it home with me and thank God for the blessing of my interest to want to be different. See you guys soon! - BCB

Don't have that ingredient? Use THIS ingredient! - Simple Guide to Substituting successfully!

The BCB [budget conscientious bandit]

I used to be obsessed with Recipe book purchasing until I noticed something about 6 months ago when I started making daily meals for my husband & I - I end up in 1 of a few common situations:

1) The ingredients are seasonal - and not offered the time of the year I need them to be
2) The ingredients can be very expensive (definitely not adding saffron to my mashed potatoes, thank you)
3) The ingredients are not in my pantry, or fridge

So every time I wanted to bake or cook, I would always be forced into grocery store trips that ended up costing  more in gas, and time than the recipe was even worth. While i'm a strong believer in shopping at multiple stores because the money saved definitely outweighs the expense of purchasing everything at one market (for example, I was paying 3.99 a lb for ground turkey at 1 market, then after wandering around my new city, I found a place that sells a 5 lb frozen package of ground turkey for 5.99 - you get my point, that will add up!) I do not advocate driving out for ingredients (1 exception to the rule; only if you're headed out to get stuffed cabbage supplies)

The most important thing I do to start any activity in the kitchen is to always keep an organized Fridge & Pantry. You think you'll remember everything you have, but eventually you'll come to the point where you're purchasing so many doubles, that you create an extra expense for no good reason! It's far greater to keep things organized in in this arena because no other area in your house will cost you more money. There's all kinds of great guides to keeping a well stocked pantry & fridge out there, and a lot of recipe books have them  conveniently there for you.

I should make a clear note, that with baking there are a lot of exceptions to substitutions. Baking is a matter of perfectly executed precision due to it's highly complex dependency on molecular relationships, and cooking is really requires taste.

While I am not a schooled chef, I am one by trial and error, and lots of reading. There's a whole world of information waiting for you to search it online. Having issues with an ingredient and need a replacement? Type in into your preferred internet search engine. I'll use this next situation as an example because it was my personal discovery - Let's say you didn't have Nutmeg in your Pantry for a recipe, so you type online 'Nutmeg Substitution' and here's my answer, but we'll pretend it's from the internet search you did 'Use Pumpkin Pie Spice. It has Nutmeg & other spices that'll add a unique twist to your dish & I guarantee you'll never use just Nutmeg. Message me if you need the resources, but if not, have fun discovering that virtually every ingredient can be substituted! My current favorite - instead of buttermilk (which I dread paying for because i'll only use it in that particular recipe -- 3/4 cup milk, and 2 tbsp vinegar and stir a little. Set for 5 mins. It's the base for my favorite pancakes!) See you guys soon! - BCB

My 3 G Wedding

How we did it for 3 Grand - starting from day 1 [and you can too!]
I need to begin by explaining we did a two part Wedding; Our vows at the end of a 5k 'Mud Run' with our pastors, friends & family, and 2 weeks later had a Reception.

This is only the beginning of a whole array 
of advice I want to offer for anyone heading down the planning-a-Wedding route, because it's not an                
easy one, and even though we had a budget Wedding, it still took a lot of                 
organization, communication, and most importantly vision. Single handedly, my opinion is that even before setting a budget, pinpoint your definitely's vs. can live without's to Establish Priorities. [For us, we decided early on we want all of our family there, no if's and or buts - so this helped us set up a flow chart per say of where we'd have to place most of our money to hold the quantity of family members combined [about 150]  Budgets spiral out of monetary control when you haven't established what you can't live without on your special day. That way, when the B word comes up [B..B..BU..budget] you'll have an easy time setting maximum & minimum amounts you'll spend in each category. For example; to bring home our picnic theme, we spent an amount you might not have on having bottled, Mexican Coca Cola -> It's made with real cane sugar!
For us, we're together an active couple, and the idea to do a run with vows, came purely from a compulsive suggestion that turned reality. We went from there. I didn't necessarily have a theme so stuck in my head that I would become Bridezilla over not attaining it, but I had a general idea of what I wanted as far as colors go - something that contrasts. So once I established this, I decided an Indoor Picnic Theme [I quickly came to this decision due to the complicated dynamics of an Outdoor Picnic - Spiders, Bees, Ants OH MY!] 

Once you've established your Vision, Priorities [Of what you can't live without] and Theme, we're ready to move on. 

There's a small disclaimer here - and that is, we wouldn't have been capable of having our Wedding come together perfectly without the help of many people - who were able to get involved once we had plans established. So many people fixate on the stresses of the budget, the costs per head, oh you name it - but you need to realize family & friends usually want to be part of having your big day come together.       


Once we had our plans together, purchased a white erase board that was up at my house, where we literally had everything up – all the details, finances & gaps. With this openness with our families & close friends, they were able to come alongside us & help where we needed it. (They explained to us it was a much greater joy to be part of our Wedding Day & helping it come together, than handing up some gift knowing they could have contributed) That’s one of the most important things I’ll tell you.

Big areas we saved money

1.      Coupons. There’s major art retail stores that have majorly great discounts; some up to 40%. Stock up, and use them weekly to purchase big items. For example, at our venue we couldn’t have candles, so we purchased a ‘Unity Sand Kit’ vs. having Unity Candles. It was around 55 originally, but was knocked down to right over 20.
2.      Are invitations worth making? It’s still a debate in my mind. We got a killer deal. My husband & I hit the discount section looking for invitations we liked, and found some – that were being discontinued so there was only 1 box. So what we did was call other stores in the same branch, and voila! Found our box. Why did we go through that trouble? Because those invitations were normally about 50 dollars a box, and we got them for 10. Our total cost for invitations was right under 50; for the invitations, the envelopes we purchased to match, the embellishments and stamps. However, my poor, then fiancĂ©, was on Invitation duty because he had more free time while completing his internship. The bad catch: it took him almost 25 hours to deal with templates, persnickety printers & what not. So you really need to do the math. Invitations start at usually around 300, so maybe you’re more template savvy & this would be an easy thing.

3.      We didn’t pay for a Wedding website, and don’t you dare either. There’s far too many free ones, only a 1 minute search on google away. I highly suggest having this. We had many issues with the invitations & people not receiving, that we had to keep a website due to all the mishaps. Plus, it’s real fun to update & so much easier than telling all your family & friends individually when things change.
4.      Our theme. Is where we saved the most money. With our vows being at a Mud Run, we almost naturally slipped into thinking ‘Picnic’ theme – and it couldn’t have been more perfect! We started hitting stores after Valentine’s Day for clearance decorations; hearts, red, white – all things along those lines made it into our baskets. This is why I really emphasize establishing a theme and/or color scheme, because you’ll then be able to


03/16/11 - Still working on! Thank you for your patience!

See you guys soon! - BCB